Sunday, 13 April 2014
Hoot Hoot

I designed this tag using PO-CONCEPT'S "Hoot Hoot" scrapkit.
This scrapkit can be purchased at the following link:
Tube used "Lady with Owls" by Alfadesire.
This tube can be purchased at the following link:

Tutorial
*Important note : drop shadow is used on all elements except element 3,36,106*
Open new 500x500 transparent page.
Place element 34 in the middle of the page.
Resize to X 251.54px, Y 247.61px, W and H 18.49%.
Place paper 9 behind element 34.
Erase any parts of the paper outside of element 34.
Place element 15 towards the left hand side of the paper layer.
Resize to X 195.50px, Y 219.00px, W and H 100%.
Place another element 15 towards the right hand side of the paper layer.
Resize to X 306.00px, Y 231.00px, W and H 100%.
Place element 76 in the middle of the paper layer.
Resize to X 251.50px, Y 242.96px, W and H 7.81%.
Place element 110 over element 76.
Resize to X 254.00px, Y 259.50px, W and H 100%.
Place element 49 behind paper layer.
Resize to X 250.00px, Y 253.50px, W and H 21.41% and -5.51 degree angle.
Place element 36 behind element 49.
Resize to X 258.31px, Y 257.48px, W and H 23.30%.
Place element 78 behind element 36 (in the middle of the page towards the bottom).
Resize to X 250.00px, Y 278.50px, W -24.30% and H 24.31%.
Place another element 78 behind element 36 (in the middle of the page towards the top).
Resize to X 251.50px, Y 117.50px, W 24.30% and H 24.31%.
Place mask of choice behind both element 36's.
Place element 33 along the top of element 34.
Resize to X 268.00px, Y 135.50px, W 15.38% and H -15.40%.
Place another element 33 along the bottom of element 34.
Resize to X 283.00px, Y 356.50px, W 15.38% and H 15.40%.
Place element 106 over the element 33 just placed.
Resize to X 237.50px, Y 351.00px, W and H 16%.
Place element 3 over element 106.
Resize to X 254.00px, Y 405.00px, W and H 15.05%.
Thanks for trying my tutorial :)

Saturday, 12 April 2014
Spring Romance
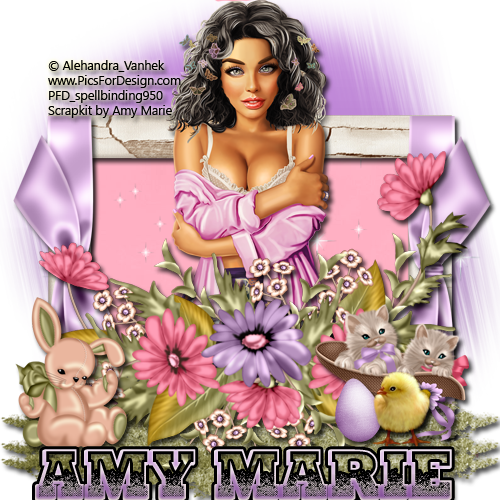
I designed this tag using Amy Marie's "Spring Romance" scrapkit.
This scrapkit can be purchased at the following link:
here
Tube used "Spring Time" by Alehandra Vanhek.
This tube can be purchased at the following link:
here
Tutorial
*Important note : drop shadow is used on all elements except element 118*
Open new 500x500 transparent page.
Place element 15 in the middle of the page.
Resize to X 249.90px, Y 257.14px, W 67.30% and H 67.36%.
Place paper 24 behind element 15.
Place mask of choice behind paper 24.
Place element 118 in the middle of the paper.
Resize to X 281.00px, 245.50px, W 90.91% and H 91.07%.
Place element 16 along the right hand side of element 15.
Resize to X 431.34px, Y 277.24px, W -64.50% and H 64.50%.
Place another element 16 along the left hand side of element 15.
Resize to X 70.22px, Y 271.02px, W and H 62.19%.
Place element 115 along the bottom of element 15.
Resize to X 250.00px, Y 419.50px, W 90.91% and H 91.18%.
Place another element 115 infront of the one just placed.
Resize to X 250.00px, Y 445.50px, W 90.91% and H 91.18%.
Place another element 115 infront of the one just placed.
Resize to X 250.00px, Y 461.00px, W 90.91% and H 91.18%.
Place element 79 along the bottom of element 15.
Resize to X 250.00px, Y 311.81px, W 79.64% and H 79.60%.
Place element 130 at the right hand side of element 79.
Resize to X 392.01px, Y 372.82px, W and H 44.90%.
Place element 27 at the left hand side of element 130.
Resize to X 357.00px, Y 409.96px, W and H 18.26% and -11.49 degree angle.
Place element 100 at the right hand side of element 27.
Resize to X 402.00px, Y 409.23px, W -67.40% and H 67.40%.
Place element 123 at the left hand side of element 79.
Resize to X 71.21px, Y 373.00px, W -37.95% and H 37.95%.
Thanks for trying my tutorial :)
Wednesday, 9 April 2014
Chic Named Diva

I designed this tag using Amy Marie's "Chic Named Diva"scrapkit.
This scrapkit can be purchased at the following link:
Tube used "PMO" by KiwiFireStorm.
This tube can be purchased at the following link:

Tutorial
*Important note : drop shadow is used on all elements*
Open new 500x500 transparent page.
Place element 35 in the middle of the page.
Resize to X 233.90px, Y 246.73px, W and H 188.33% and -7.05 degree angle.
Place paper 30 behind element 35.
Erase any parts of the paper outside of element 35.
Place element 78 in the middle of the paper layer.
Resize to X 246.50px, Y 257.00px, W and H 100%.
Place element 90 in the middle of the paper layer.
Resize to X 232.00px, Y 223.74px, W and H 46.99%.
Place element 82 along the bottom of element 35.
Resize to X 242.50px, Y 400.50px, W and H 100%.
Place element 83 along the bottom of element 35.
Resize to X 247.50px, Y 414.50px, W and H 100%.
Place element 163 at bottom right hand corner of element 35.
Resize to X 350.04px, Y 386.16px, W and H 45.08%.
Place element 161 at the left hand side of element 163.
Resize to X 284.00px, Y 431.83px, W and H 29.25%.
Place element 64 infront of element 161.
Resize to X 307.10px, Y 462.00px, W and H 24.91%.
Place element 52 at the right hand side of element 163.
Resize to X 428.92px, Y 404.22px, W and H 41.02%.
Place element 162 at the left hand side of element 52.
Resize to X 394.76px, Y 419.95px, W -28.03% and H 28.03%.
Place element 5 at the top left hand corner of element 35.
Resize to X 90.00px, Y 123.84px, W and H 39.84% and -15.00 degree angle.
Thanks for trying my tutorial :)
Monday, 7 April 2014
Treasured Moments 2

I designed this tag using Amy Marie's "Treasured Moments 2" scrapkit.
This scrapkit can be purchased at the following link:
Tube used "Eth" by Zlata M.
This tube can be purchased at the following link:

Tutorial
*Important note : drop shadow is used on all elements apart from element 101*
Open new 500x500 transparent page.
Place element 17 in the middle of the page (towards the right hand side).
Resize to X 342.50px, Y 250.00px, W and H 100%.
Place another element 17 in the middle of the page (towards the left hand side).
Resize to X 152.00px, Y 250.00px, W 49.68% and H 49.62% and -8.24 degree angle.
Place paper 3 behind both element 17's.
Place mask of choice behind paper layer.
Place element 62 at the bottom left hand corner of the second element 17 placed.
Resize to X 128.03px, Y 322.28px, W 47.47% and H 47.43%.
Place another element 62 at the bottom right hand corner of the first element 17 placed.
Resize to X 380.24px, Y 316.35px, W -45.85% and H 45.81%.
Place element 58 in the middle of the both element 17's.
Resize to X 260.00px, Y 278.80px, W and H 64.80%.
Place element 61 in the middle of both element 17's (along the bottom).
Resize to X 260.00px, Y 400.72px, W 50.59% and H 50.62%.
Place element 132 at the top right hand corner of the first element 17 placed.
Resize to X 371.76px, Y 94.10px, W and H 56.60%.
Place element 101 in the middle of all elements placed.
Resize to X 229.00px, Y 278.50px, W and H 100%.
Thanks for trying my tutorial :)
Saturday, 5 April 2014
Spring is here

I designed this tag using Amy Marie's "Spring is here" scrapkit.
This scrapkit can be purchased at the following link:
Tube used "Spring Flower" by Zlata M.
This tube can be purchased at the following link:

Tutorial
*Important note : drop shadow effect is used on all elements except element 129*
Open new 500x500 transparent page.
Place element 42 in the middle of the page.
Resize to X 248.39px, Y 238.61px, W 65.13% and H 65.09%.
Place element 65 ontop of element 42.
Resize to X 248.50px, Y 238.50px, W 81.53% and H 81.50%.
Place element 66 ontop of element 65.
Resize to X 252.83px, Y 190.83px, W 72.67% and H 72.64%.
Place paper 3 behind element 42.
Place mask of choice behind paper layer.
Place element 129 at the right hand side of element 66.
Resize to X 376.54px, Y 247.89px, W and H 81.64%.
Place element 125 along the bottom of element 66.
Resize to X 269.85px, Y 433.00px, W 83.69% and H 83.78%.
Place element 101 at the right hand side of element 125.
Resize to X 383.51px, Y 403.71px, W -39.77% and H 39.77%.
Place element 15 at the left hand side of element 125.
Resize to X 96.98px, Y 442.00px, W and H 35.72%.
Resize to X 96.98px, Y 442.00px, W and H 35.72%.
Place element 97 infront of element 101.
Resize to X 382.71px, Y 460.00px, W and H 32.05%.
Thanks for trying my tutorial :)
Thursday, 3 April 2014
Butterfly

I designed this tag using PO-CONCEPT's "Butterfly" scrapkit.
This scrapkit can be purchased at the following link:
Tube used "Eva" by Zlata M.
This tube can be purchased at the following link:

Tutorial
*Important note : drop shadow effect, inner glow and outer glow is used on all elements except element 26*
Open new 500x500 transparent page.
Place element 13 in the middle of the page.
Resize to X 231.88px, Y 244.60px, W and H 20.50% and -6.92 degree angle.
Place paper 3 behind element 13.
Erase any parts of the paper outside of element 13.
Place element 26 in the middle of the paper layer.
Resize to X 211.50px, Y 250.00px, W and H 24%.
Place mask of choice behind paper layer and element 13.
Place element 18 at the bottom left hand side of mask.
Resize to X 232.50px, Y 272.00px, W and H 24.11%.
Place another element 18 at top right hand side of mask.
Resize to X 258.50px, Y 261.00px, W -24.11% and H 24.10%.
Place element 1 at bottom left hand corner of element 13.
Resize to X 144.00px, Y 395.82px, W 12.30% and H 12.31% and -18.59 degree angle.
Place element 16 over element 1.
Resize to X 143.60px, Y 410.00px, W and H 7.51%.
Place another element 1 at top right hand corner of element 13.
Resize to X 311.93px, Y 87.89px, W 12.85% and H -12.86% and 107.69 degree angle.
Place another element 16 over the element 1 just placed.
Resize to X 327.80px, Y 80.29px, W and H 7.39%.
Place element 56 at bottom right hand corner of element 13.
Resize to X 279.34px, Y 290.36px, W and H 14.29% and -5.87 degree angle.
Place element 87 along the bottom of element 13.
Resize to X 243.80px, Y 455.27px, W and H 17.43% and -6.74 degree angle
Thanks for trying my tutorial :)
Flower Bunny

I designed this tag using Amy Marie's "Flower Bunny" scrapkit.
This scrapkit can be purchased at the following link:
Tube used "Loretta" by Zlata M.
This tube can be purchased at the following link:

Tutorial
*Important note : drop shadow effect is used on all elements except elements 2,3,45,106.*
Open new 500x500 transparent page.
Place element 87 in the middle of the page.
Resize to X 224.17px, Y 229.85px, W and H 70.49% and -9.77 degree angle.
Place paper 25 behind element 87.
Erase any parts of the paper outside of element 87.
Place element 2 in the middle of the paper layer.
Resize to X 228.50px, Y 279.50px, W and H 100%.
Place mask of choice behind paper layer.
Place element 3 at the bottom left hand side of the mask.
Resize to X 154.00px, Y 320.00px, W and H 100%.
Place another element 3 in the middle of the right hand side of the mask.
Resize to X 302.50px, Y 204.00px, W and H 100%.
Place element 45 along the bottom of element 87.
Resize to X 251.00px, Y 430.50px, W 90.91% and H 91.18%.
Place another element 45 infront of the one just placed.
Resize to X 250.00px, Y 458.50px, W 90.91% and H 91.18%.
Place elemen 125 at top left hand corner of element 87.
Resize to X 129.21px, Y 160.63px, W 51.62% and H 51.60% and 18.38 degree angle.
Place element 62 at top right hand corner of element 87.
Resize to X 274.50px, Y 50.50px, W and H 100%.
Place element 106 at bottom left hand corner of element 87.
Resize to X 147.50px, Y 311.00px, W and H 100%.
Place element 41 infront of element 106.
Resize to X 136.19px, Y 323.18px, W and H 75.63% and -.55 degree angle.
Place another element 125 at the bottom right hand corner of element 87.
Resize to X 317.00px, Y 299.00px, W and H 100%.
Thanks for trying my tutorial :)
Subscribe to:
Posts
(Atom)